Trigger CI/CD events with artifact changes
Create an automation that triggers when an artifact is changed. Use artifact automations when you want to automate downstream actions for versioning artifacts. To create an automation, define the action you want to occur based on an event type.
Some common use cases for automations that are triggered from changes to an artifact include:
- When a new version of an evaluation/holdout dataset is uploaded, trigger a launch job that performs inference using the best training model in the model registry and creates a report with performance information.
- When a new version of the training dataset is labeled as "production," trigger a retraining launch job with the configs from the current best-performing model.
Artifact automations are scoped to a project. This means that only events within a project will trigger an artifact automation.
This is in contrast to automations created in the W&B Model Registry. Automations created in the model registry are in scope of the Model Registry; they are triggered when events are performed on model versions linked to the Model Registry. For information on how to create an automations for model versions, see the Automations for Model CI/CD page in the Model Registry chapter.
Event types
An event is a change that takes place in the W&B ecosystem. You can define two different event types for artifact collections in your project: A new version of an artifact is created in a collection and An artifact alias is added.
Use the A new version of an artifact is created in a collection event type for applying recurring actions to each version of an artifact. For example, you can create an automation that automatically starts a training job when a new dataset artifact version is created.
Use the An artifact alias is added event type to create an automation that activates when a specific alias is applied to an artifact version. For example, you could create an automation that triggers an action when someone adds "test-set-quality-check" alias to an artifact that then triggers downstream processing on that dataset.
Action types
An action is a responsive mutation (internal or external) that occurs as a result of some trigger. There are two types of actions you can create in response to events on artifact collections in your project: webhooks and W&B Launch Jobs.
- Webhooks: Communicate with an external web server from W&B with HTTP requests.
- W&B Launch job: Jobs are reusable, configurable run templates that allow you to quickly launch new runs locally on your desktop or external compute resources such as Kubernetes on EKS, Amazon SageMaker, and more.
The following sections describe how to create an automation with webhooks and W&B Launch.
Create a webhook automation
Automate a webhook based on an action with the W&B App UI. To do this, you will first establish a webhook, then you will configure the webhook automation.
Specify an endpoint for your webhook that has an Address record (A record). W&B does not support connecting to endpoints that are exposed directly with IP addresses such as [0-255].[0-255].[0-255].[0.255] or endpoints exposed as localhost. This restriction helps protect against server-side request forgery (SSRF) attacks and other related threat vectors.
Add a secret for authentication or authorization
Secrets are team-level variables that let you obfuscate private strings such as credentials, API keys, passwords, tokens, and more. W&B recommends you use secrets to store any string that you want to protect the plain text content of.
To use a secret in your webhook, you must first add that secret to your team's secret manager.
- Only W&B Admins can create, edit, or delete a secret.
- Skip this section if the external server you send HTTP POST requests to does not use secrets.
- Secrets are also available if you use W&B Server in an Azure, GCP, or AWS deployment. Connect with your W&B account team to discuss how you can use secrets in W&B if you use a different deployment type.
There are two types of secrets W&B suggests that you create when you use a webhook automation:
- Access tokens: Authorize senders to help secure webhook requests
- Secret: Ensure the authenticity and integrity of data transmitted from payloads
Follow the instructions below to create a webhook:
- Navigate to the W&B App UI.
- Click on Team Settings.
- Scroll down the page until you find the Team secrets section.
- Click on the New secret button.
- A modal will appear. Provide a name for your secret in the Secret name field.
- Add your secret into the Secret field.
- (Optional) Repeat steps 5 and 6 to create another secret (such as an access token) if your webhook requires additional secret keys or tokens to authenticate your webhook.
Specify the secrets you want to use for your webhook automation when you configure the webhook. See the Configure a webhook section for more information.
Once you create a secret, you can access that secret in your W&B workflows with $.
Configure a webhook
Before you can use a webhook, you will first need to configure that webhook in the W&B App UI.
- Only W&B Admins can configure a webhook for a W&B Team.
- Ensure you already created one or more secrets if your webhook requires additional secret keys or tokens to authenticate your webhook.
- Navigate to the W&B App UI.
- Click on Team Settings.
- Scroll down the page until you find the Webhooks section.
- Click on the New webhook button.
- Provide a name for your webhook in the Name field.
- Provide the endpoint URL for the webhook in the URL field.
- (Optional) From the Secret dropdown menu, select the secret you want to use to authenticate the webhook payload.
- (Optional) From the Access token dropdown menu, select the access token you want to use to authorize the sender.
- (Optional) From the Access token dropdown menu select additional secret keys or tokens required to authenticate a webhook (such as an access token).
See the Troubleshoot your webhook section to view where the secret and access token are specified in the POST request.
Add a webhook
Once you have a webhook configured and (optionally) a secret, navigate to your project workspace. Click on the Automations tab on the left sidebar.
- From the Event type dropdown, select an event type.
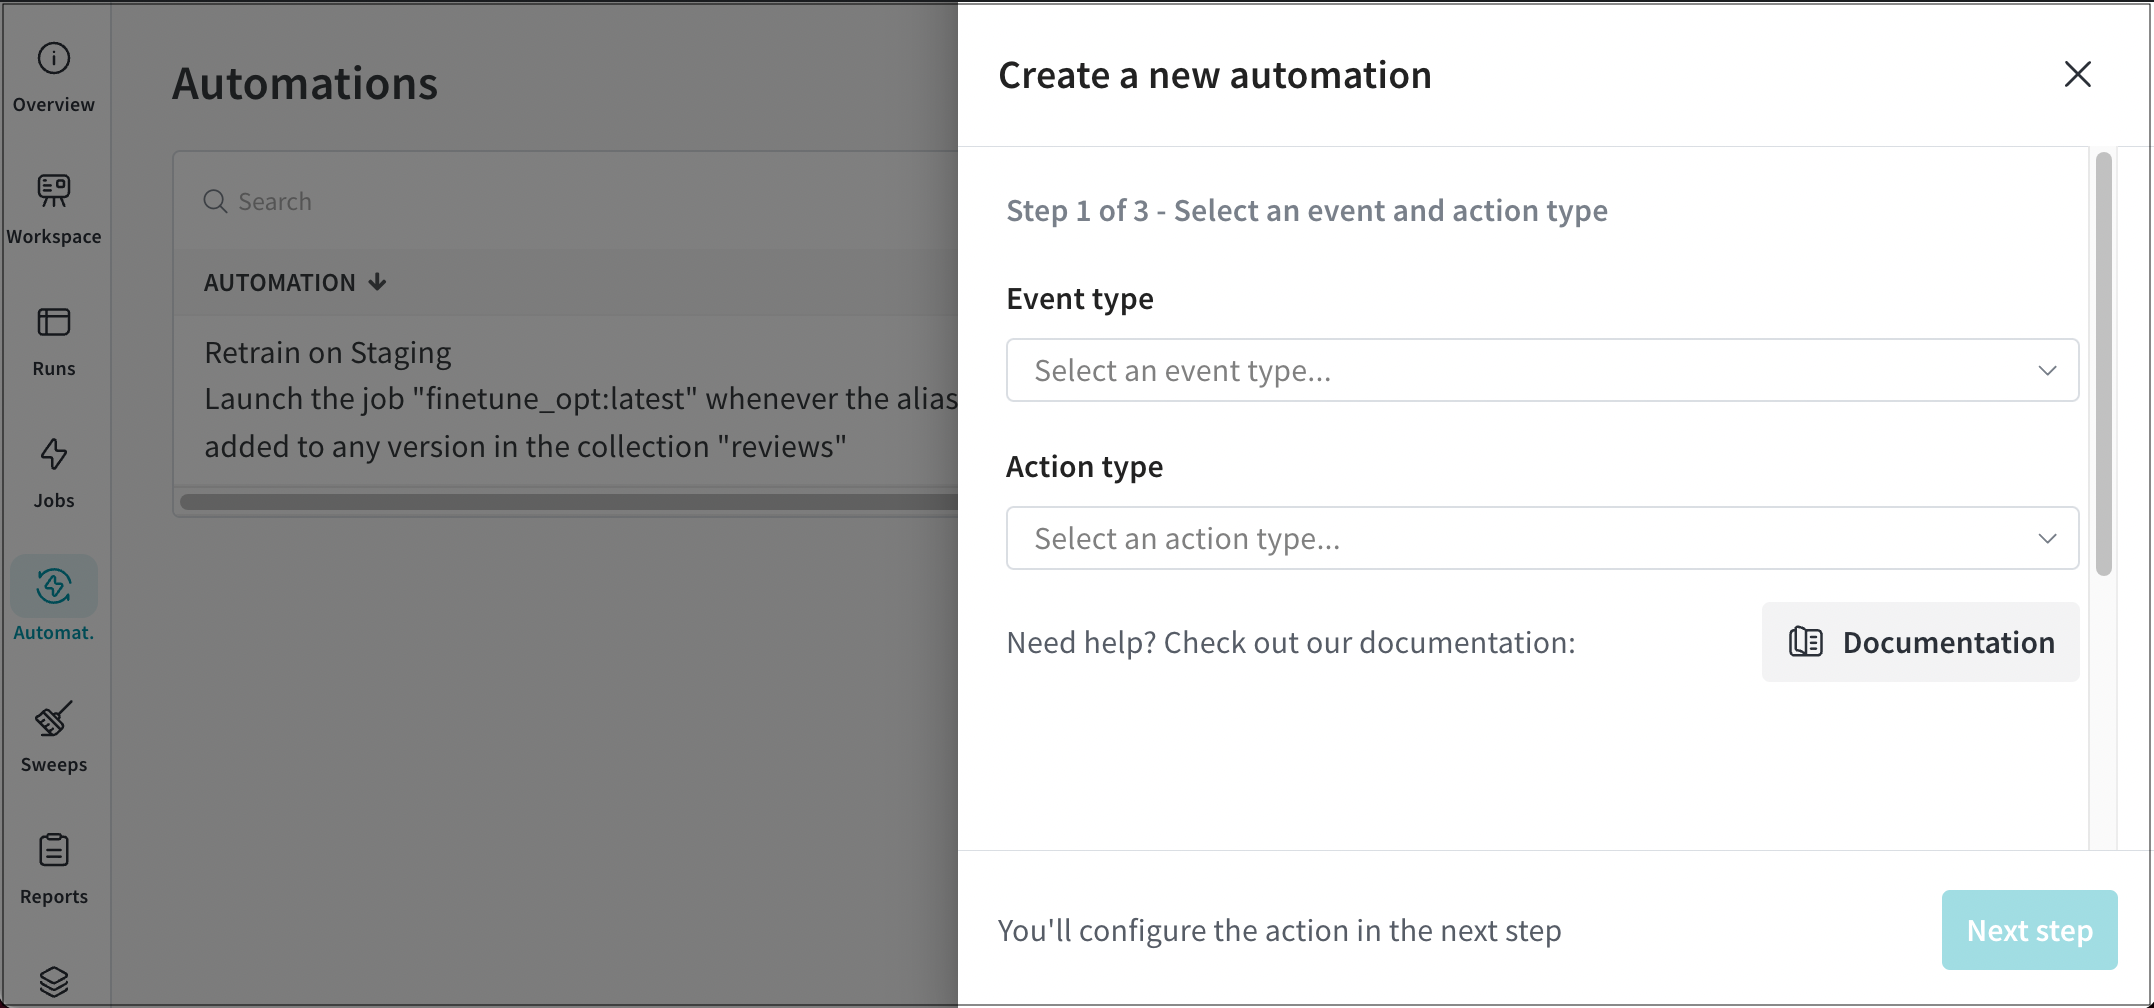
- If you selected A new version of an artifact is created in a collection event, provide the name of the artifact collection that the automation should respond to from the Artifact collection dropdown.
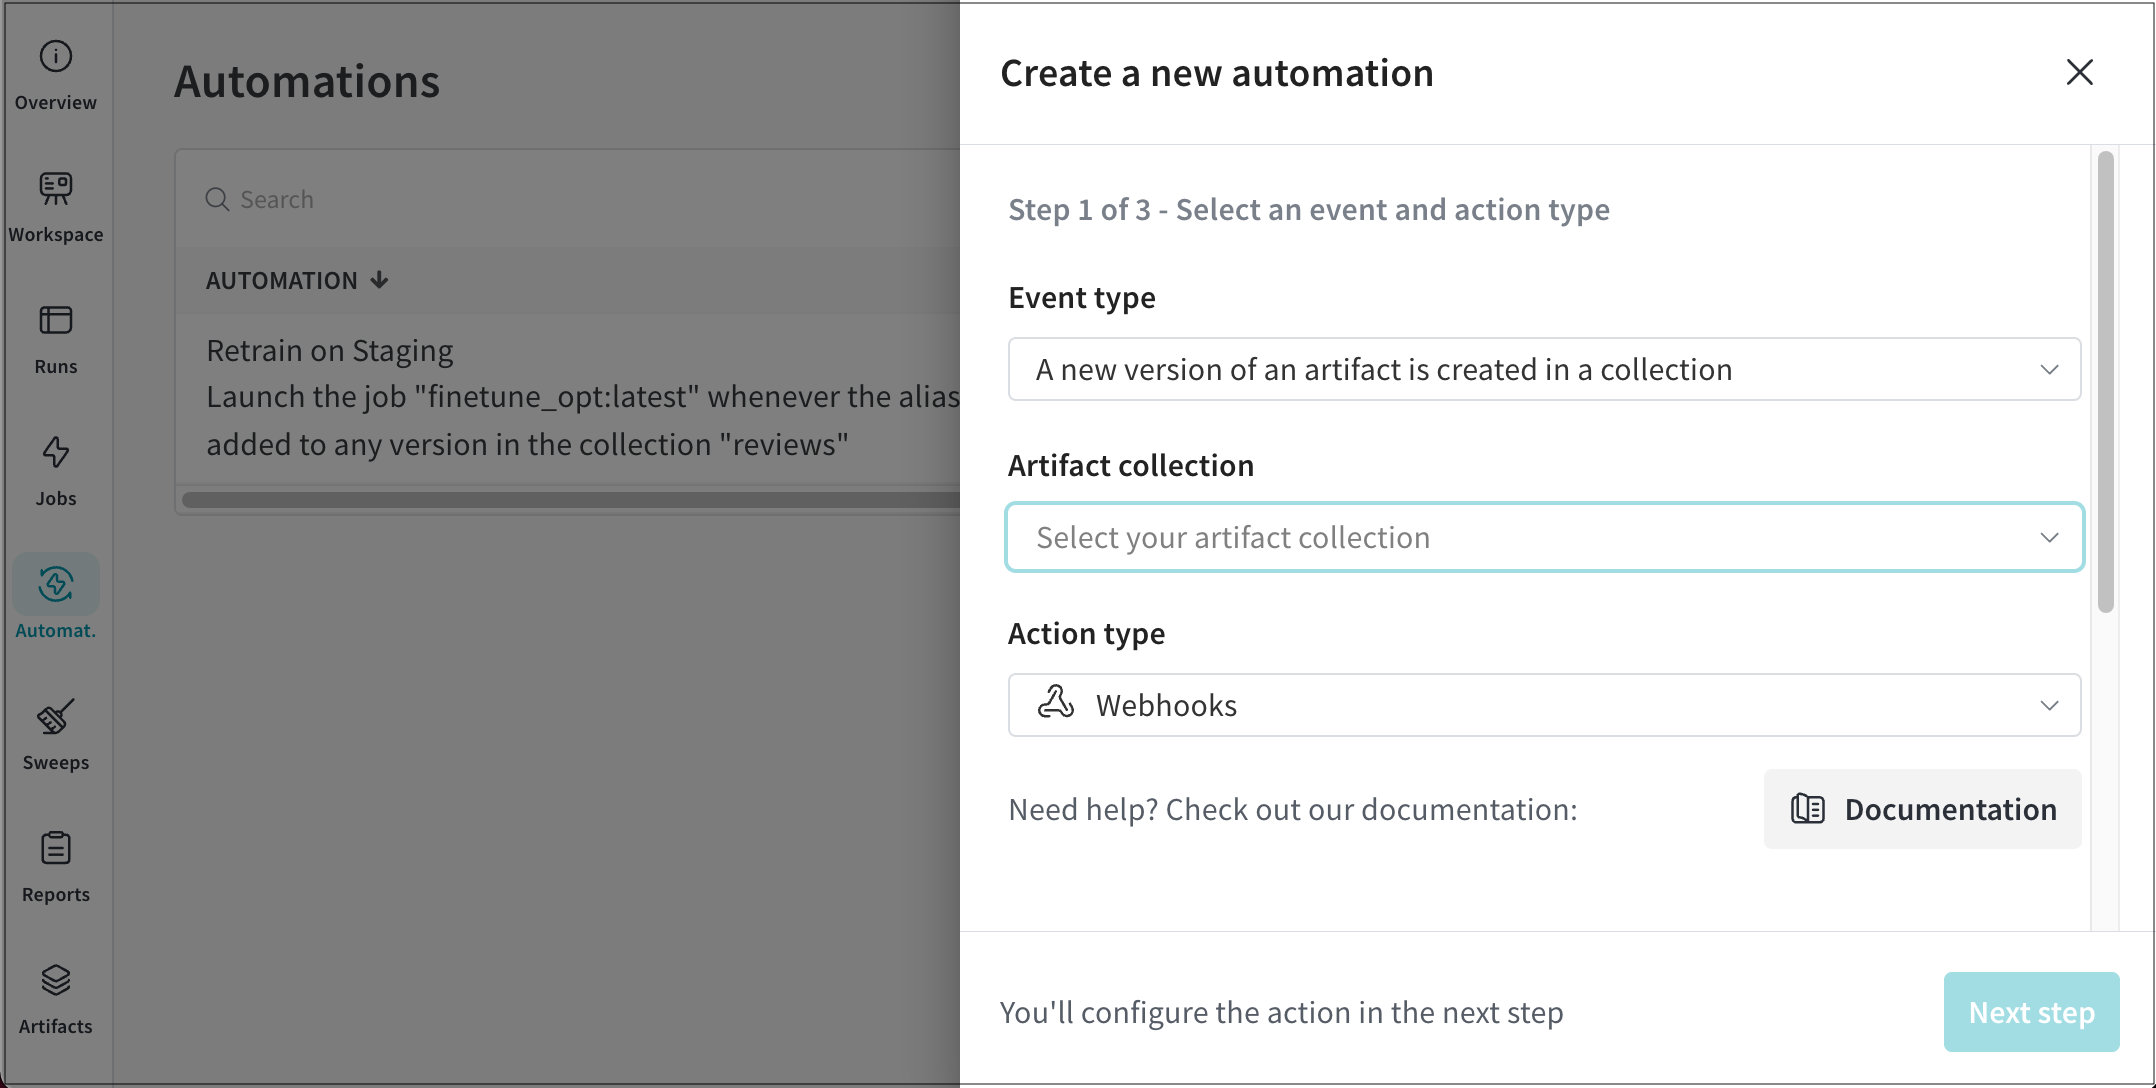
- Select Webhooks from the Action type dropdown.
- Click on the Next step button.
- Select a webhook from the Webhook dropdown.
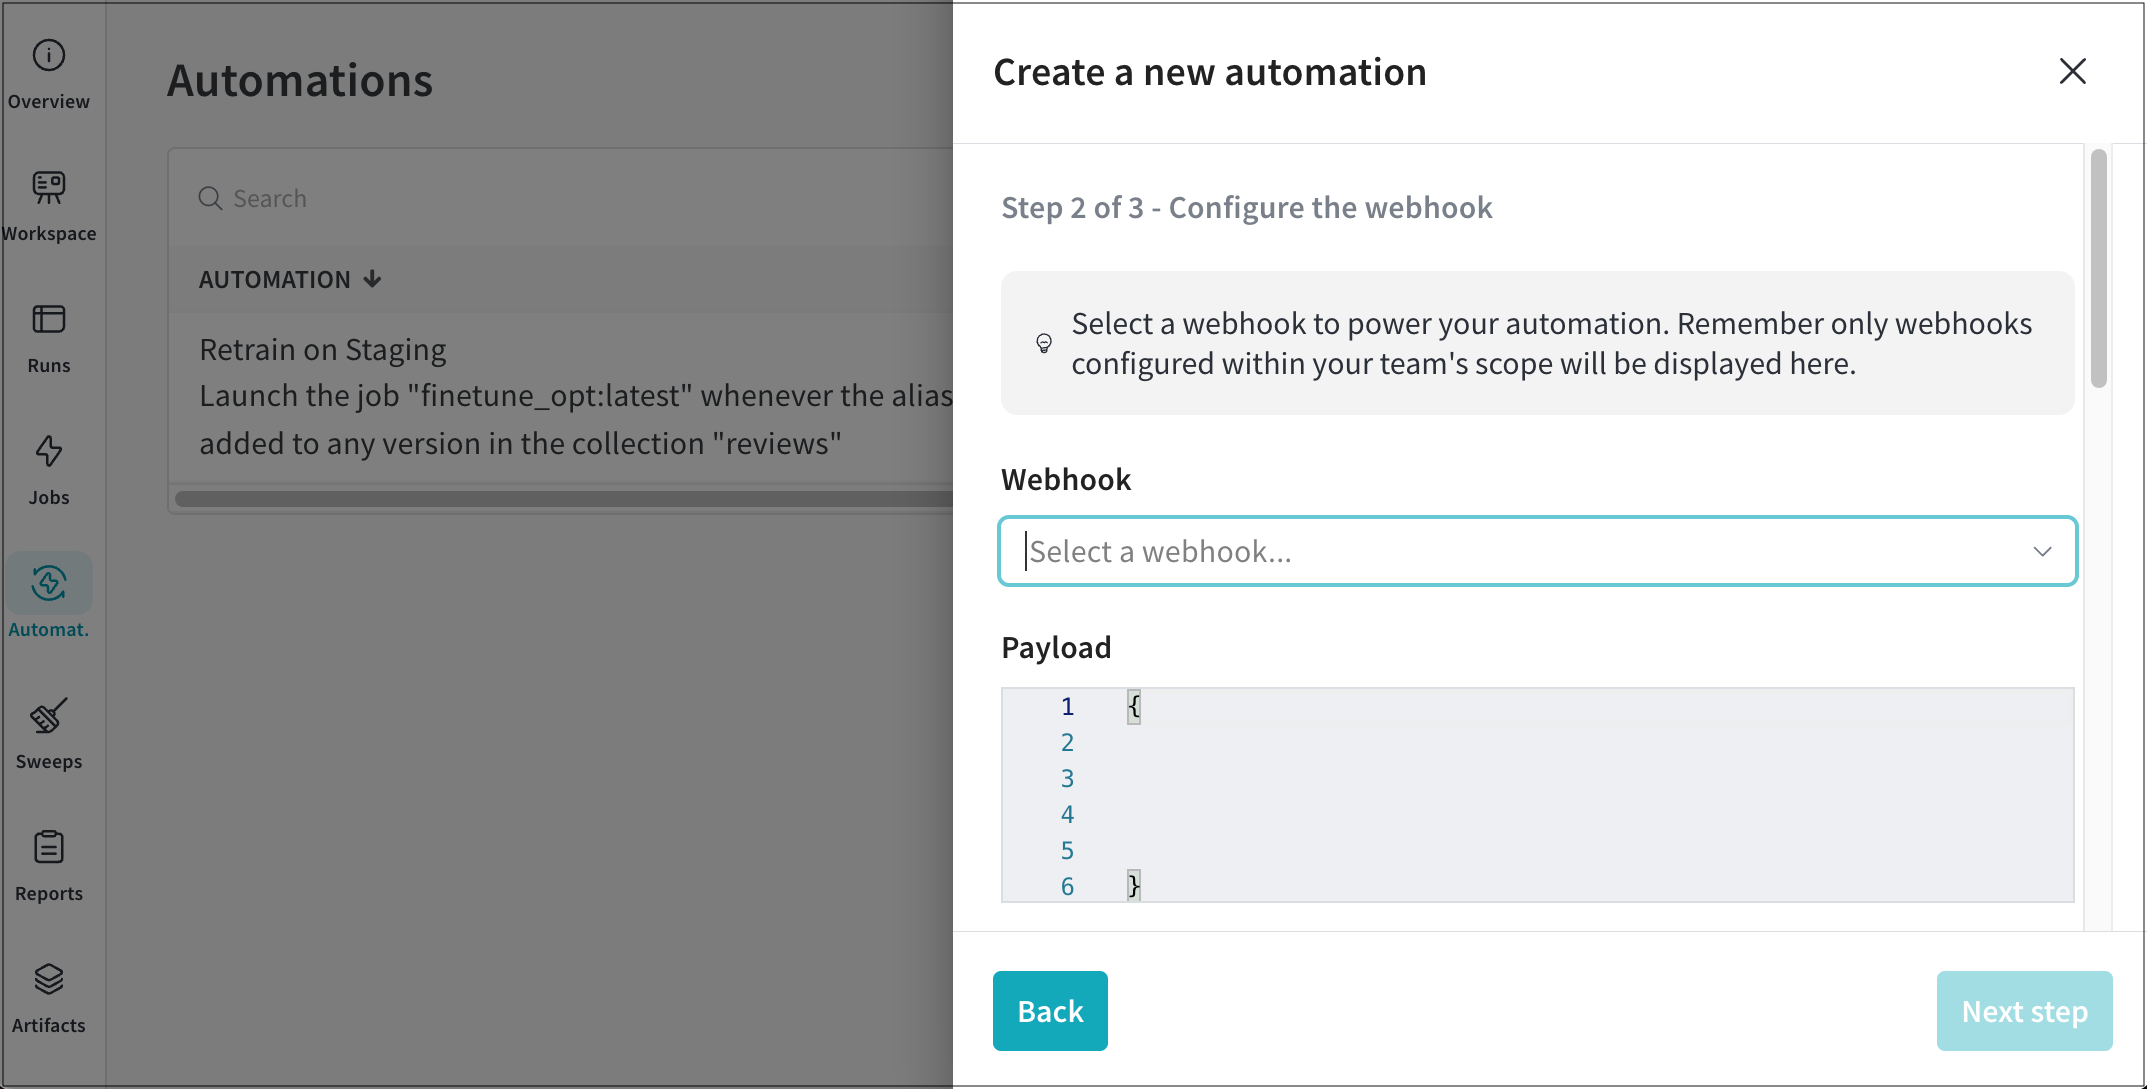
- (Optional) Provide a payload in the JSON expression editor. See the Example payload section for common use case examples.
- Click on Next step.
- Provide a name for your webhook automation in the Automation name field.
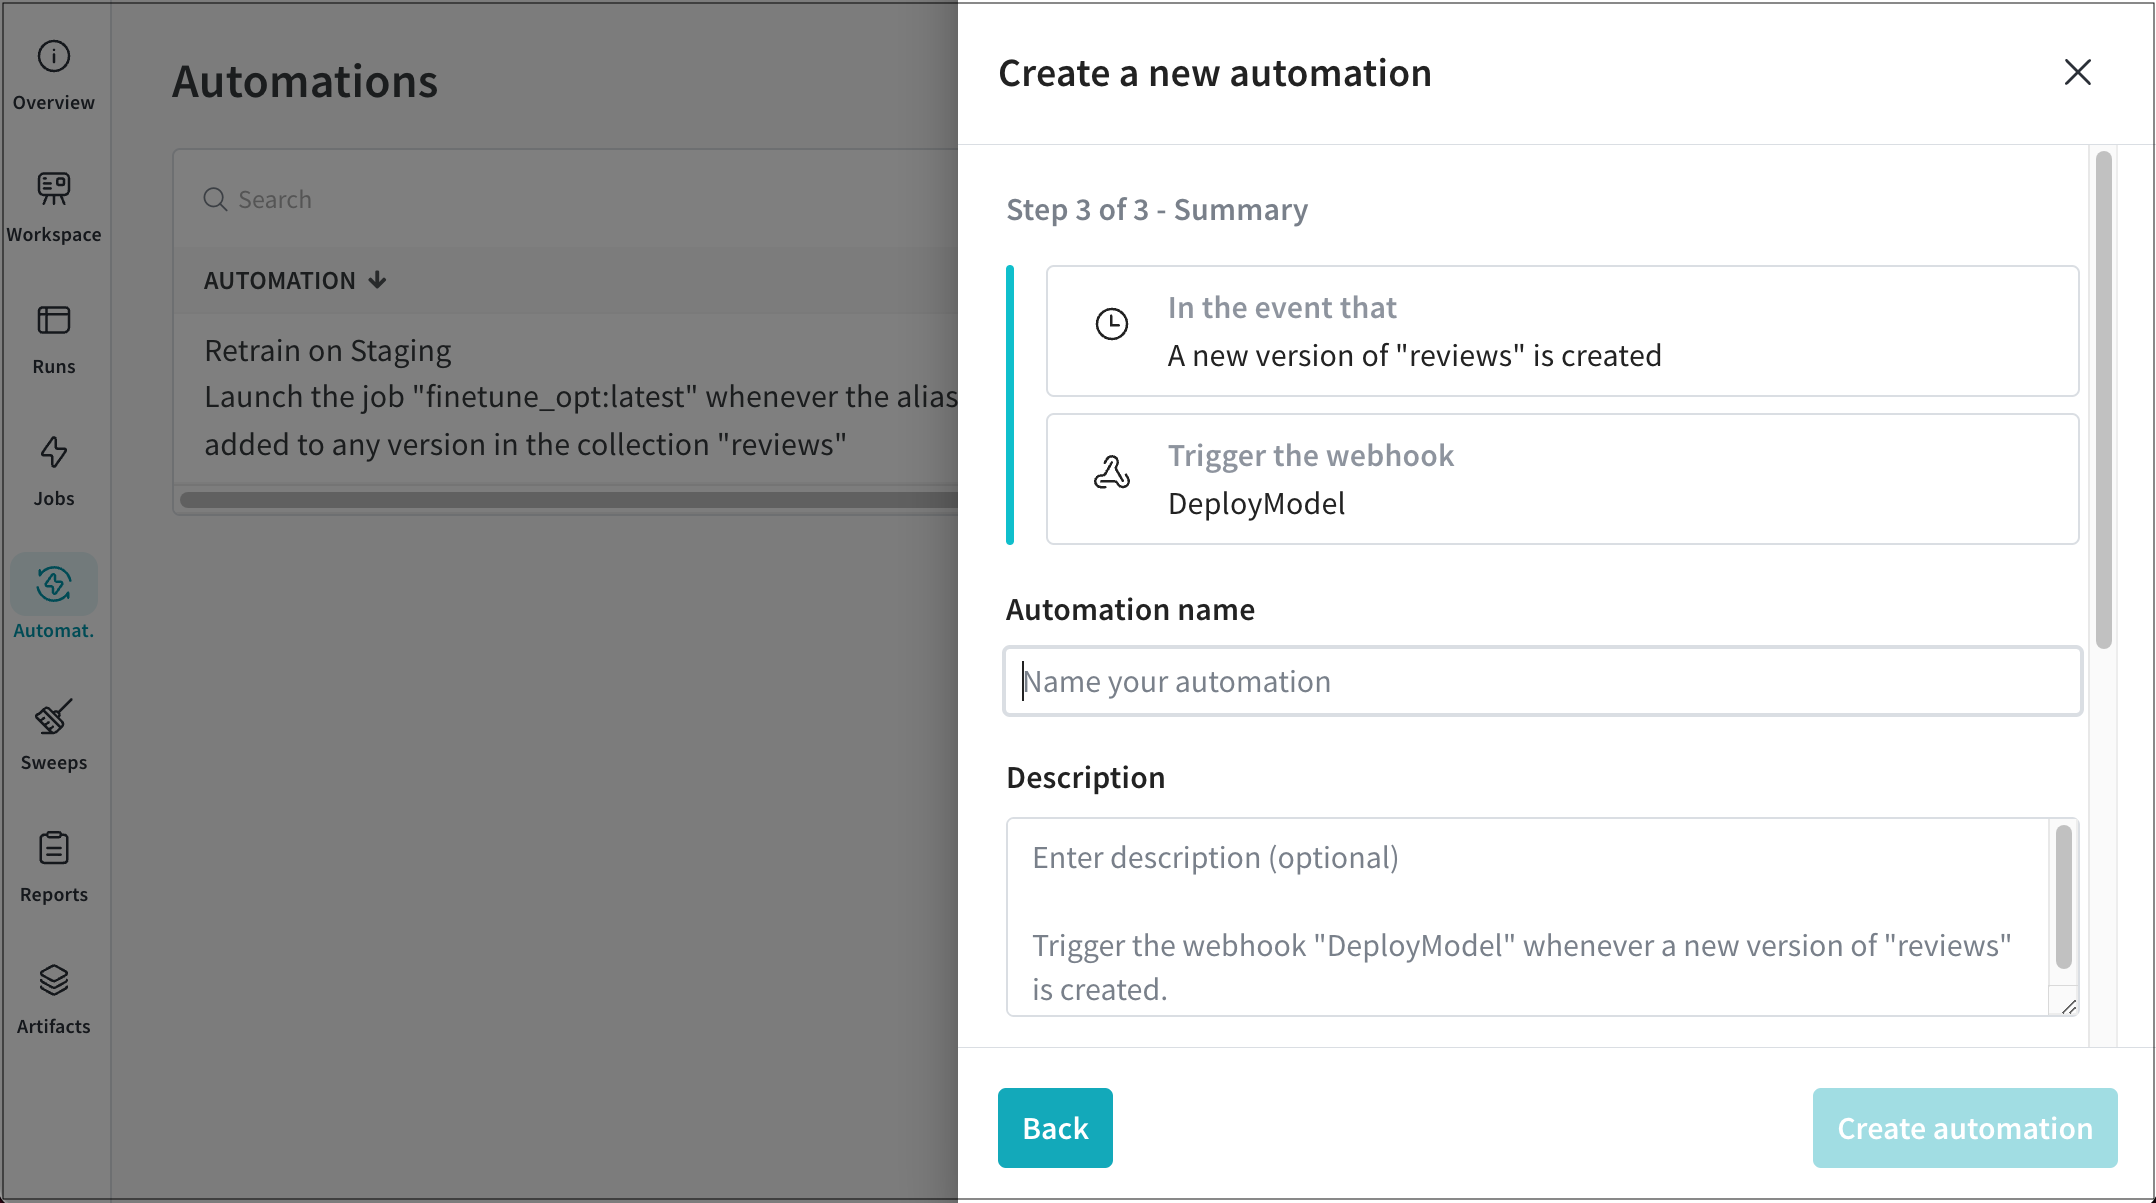
- (Optional) Provide a description for your webhook.
- Click on the Create automation button.
Example payloads
The following tabs demonstrate example payloads based on common use cases. Within the examples they reference the following keys to refer to condition objects in the payload parameters:
${event_type}Refers to the type of event that triggered the action.${event_author}Refers to the user that triggered the action.${artifact_version}Refers to the specific artifact version that triggered the action. Passed as an artifact instance.${artifact_version_string}Refers to the specific artifact version that triggered the action. Passed as a string.${artifact_collection_name}Refers to the name of the artifact collection that the artifact version is linked to.${project_name}Refers to the name of the project owning the mutation that triggered the action.${entity_name}Refers to the name of the entity owning the mutation that triggered the action.
- GitHub repository dispatch
- Microsoft Teams notification
- Slack notifications
Verify that your access tokens have required set of permissions to trigger your GHA workflow. For more information, see these GitHub Docs.
Send a repository dispatch from W&B to trigger a GitHub action. For example, suppose you have workflow that accepts a repository dispatch as a trigger for the on key:
on:
  repository_dispatch:
    types: BUILD_AND_DEPLOY
The payload for the repository might look something like:
{
  "event_type": "BUILD_AND_DEPLOY",
  "client_payload":
  {
    "event_author": "${event_author}",
    "artifact_version": "${artifact_version}",
    "artifact_version_string": "${artifact_version_string}",
    "artifact_collection_name": "${artifact_collection_name}",
    "project_name": "${project_name}",
    "entity_name": "${entity_name}"
    }
}
The event_type key in the webhook payload must match the types field in the GitHub workflow YAML file.
The contents and positioning of rendered template strings depends on the event or model version the automation is configured for. ${event_type} will render as either "LINK_ARTIFACT" or "ADD_ARTIFACT_ALIAS". See below for an example mapping:
${event_type} --> "LINK_ARTIFACT" or "ADD_ARTIFACT_ALIAS"
${event_author} --> "<wandb-user>"
${artifact_version} --> "wandb-artifact://_id/QXJ0aWZhY3Q6NTE3ODg5ODg3""
${artifact_version_string} --> "<entity>/<project_name>/<artifact_name>:<alias>"
${artifact_collection_name} --> "<artifact_collection_name>"
${project_name} --> "<project_name>"
${entity_name} --> "<entity>"
Use template strings to dynamically pass context from W&B to GitHub Actions and other tools. If those tools can call Python scripts, they can consume W&B artifacts through the W&B API.
For more information about repository dispatch, see the official documentation on the GitHub Marketplace.
Configure an ‘Incoming Webhook' to get the webhook URL for your Teams Channel by configuring. The following is an example payload:
{
"@type": "MessageCard",
"@context": "http://schema.org/extensions",
"summary": "New Notification",
"sections": [
  {
    "activityTitle": "Notification from WANDB",
    "text": "This is an example message sent via Teams webhook.",
    "facts": [
      {
        "name": "Author",
        "value": "${event_author}"
      },
      {
        "name": "Event Type",
        "value": "${event_type}"
      }
    ],
    "markdown": true
  }
]
}
You can use template strings to inject W&B data into your payload at the time of execution (as shown in the Teams example above).
Setup your Slack app and add an incoming webhook integration with the instructions highlighted in the Slack API documentation. Ensure that you have the secret specified under Bot User OAuth Token as your W&B webhook’s access token.
The following is an example payload:
  {
      "text": "New alert from WANDB!",
  "blocks": [
      {
              "type": "section",
          "text": {
              "type": "mrkdwn",
              "text": "Artifact event: ${event_type}"
          }
      },
          {
              "type":"section",
              "text": {
              "type": "mrkdwn",
              "text": "New version: ${artifact_version_string}"
          }
          },
          {
          "type": "divider"
      },
          {
              "type": "section",
          "text": {
              "type": "mrkdwn",
              "text": "Author: ${event_author}"
          }
          }
      ]
  }
Troubleshoot your webhook
Interactively troubleshoot your webhook with the W&B App UI or programmatically with a Bash script. You can troubleshoot a webhook when you create a new webhook or edit an existing webhook.
- W&B App UI
- Bash script
Interactively test a webhook with the W&B App UI.
- Navigate to your W&B Team Settings page.
- Scroll to the Webhooks section.
- Click on the horizontal three docs (meatball icon) next to the name of your webhook.
- Select Test.
- From the UI panel that appears, paste your POST request to the field that appears.
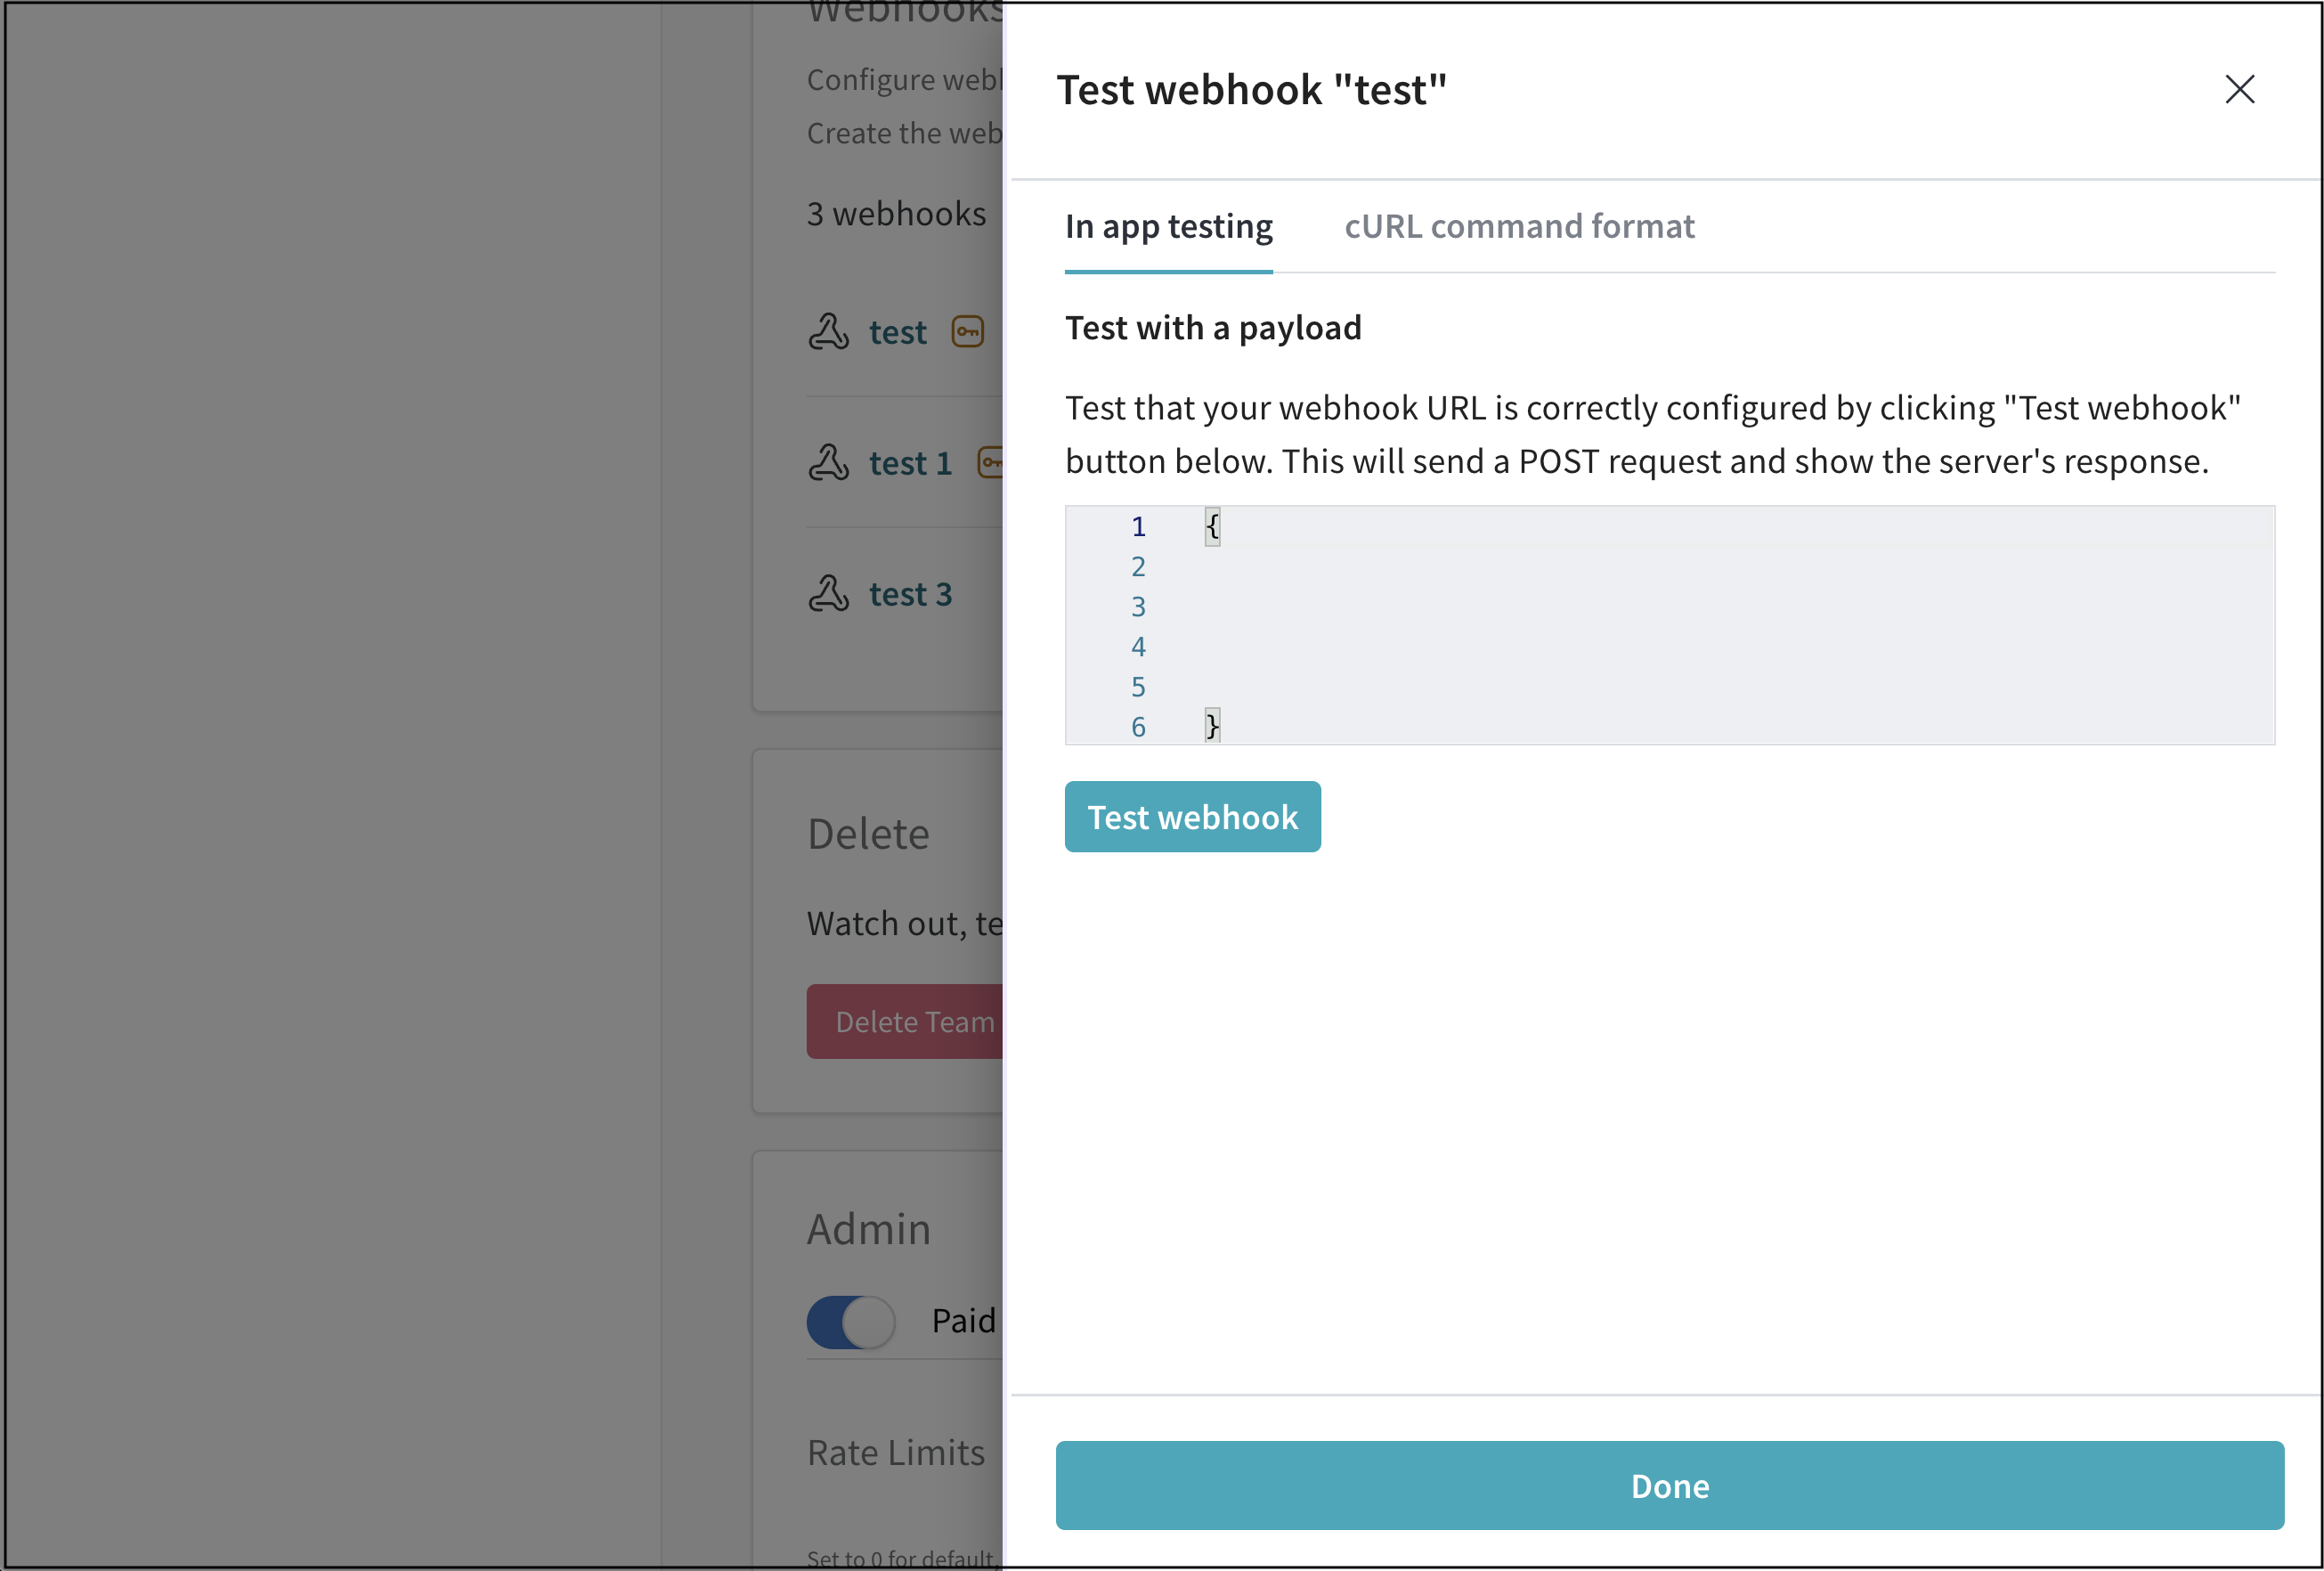
- Click on Test webhook.
Within the W&B App UI, W&B posts the response made by your endpoint.
See Testing Webhooks in Weights & Biases YouTube video to view a real-world example.
The following bash script generates a POST request similar to the POST request W&B sends to your webhook automation when it is triggered.
Copy and paste the code below into a shell script to troubleshoot your webhook. Specify your own values for the following:
ACCESS_TOKENSECRETPAYLOADAPI_ENDPOINT
#!/bin/bash

# Your access token and secret
ACCESS_TOKEN="your_api_key"
SECRET="your_api_secret"

# The data you want to send (for example, in JSON format)
PAYLOAD='{"key1": "value1", "key2": "value2"}'

# Generate the HMAC signature
# For security, Wandb includes the X-Wandb-Signature in the header computed
# from the payload and the shared secret key associated with the webhook
# using the HMAC with SHA-256 algorithm.
SIGNATURE=$(echo -n "$PAYLOAD" | openssl dgst -sha256 -hmac "$SECRET" -binary | base64)

# Make the cURL request
curl -X POST \
  -H "Content-Type: application/json" \
  -H "Authorization: Bearer $ACCESS_TOKEN" \
  -H "X-Wandb-Signature: $SIGNATURE" \
  -d "$PAYLOAD" API_ENDPOINT
Create a launch automation
Automatically start a W&B Job.
This section assumes you already have created a job, a queue, and have an active agent polling. For more information, see the W&B Launch docs.
- From the Event type dropdown, select an event type. See the Event type section for information on supported events.
- (Optional) If you selected A new version of an artifact is created in a collection event, provide the name of the artifact collection from the Artifact collection dropdown.
- Select Jobs from the Action type dropdown.
- Click Next step.
- Select a W&B Launch job from the Job dropdown.
- Select a version from the Job version dropdown.
- (Optional) Provide hyperparameter overrides for the new job.
- Select a project from the Destination project dropdown.
- Select a queue to enqueue your job to.
- Click on Next step.
- Provide a name for your webhook automation in the Automation name field.
- (Optional) Provide a description for your webhook.
- Click on the Create automation button.
View an automation
View automations associated to an artifact from the W&B App UI.
- Navigate to your project workspace on the W&B App.
- Click on the Automations tab on the left sidebar.
Within the Automations section you can find the following properties for each automations that was created in your project"
- Trigger type: The type of trigger that was configured.
- Action type: The action type that triggers the automation. Available options are Webhooks and Launch.
- Action name: The action name you provided when you created the automation.
- Queue: The name of the queue the job was enqueued to. This field is left empty if you selected a webhook action type.
Delete an automation
Delete an automation associated with a artifact. Actions in progress are not affected if you delete that automation before the action completes.
- Navigate to your project workspace on the W&B App.
- Click on the Automations tab on the left sidebar.
- From the list, select the name of the automation you want to view.
- Hover your mouse next to the name of the automation and click on the kebob (three vertical dots) menu.
- Select Delete.